New Proxy creation
In the Proxy menu, you can create and manage a list of your Proxies
You can also forward proxies in created profiles to other users or your team members
To add a new proxy, click +
You can upload a list of your proxies as a text or as a file.
Import by text:
- entry for each new Proxy must start on a new line
- if you do not specify the proxy protocol (e.g. SOCKS5), then the protocol will be perceived as http by default
Add proxy
Use the following entry formats for the specified Proxies types
SOCKS5
socks5://ip-address:port:login:password
socks5://ip-address:port
socks5://login:password|ip-address:port
socks5://login:password@ip-address:port
HTTP
ip-address:port:login:password
ip-address:port
login:password|ip-address:port
login:password@ip-address:port
ip-address:port
login:password|ip-address:port
login:password@ip-address:port
Assign a Proxy name
- The Proxy name will be displayed in the list when you are selecting a Proxy for a new profile. To assign a name to a new Proxy — specify a name after the :: symbol in the end of entering the basic proxy parameters, when you are creating a new Proxy,
- ip-address:port:login:password::name
- socks5://ip-address:port:login:password::name
Add link to change IP address
If the your Proxy IP address changed by a link, you can add this link to the proxy
In this case, the change of the IP address will occur on the Profile panel in the ANTIK Main screen
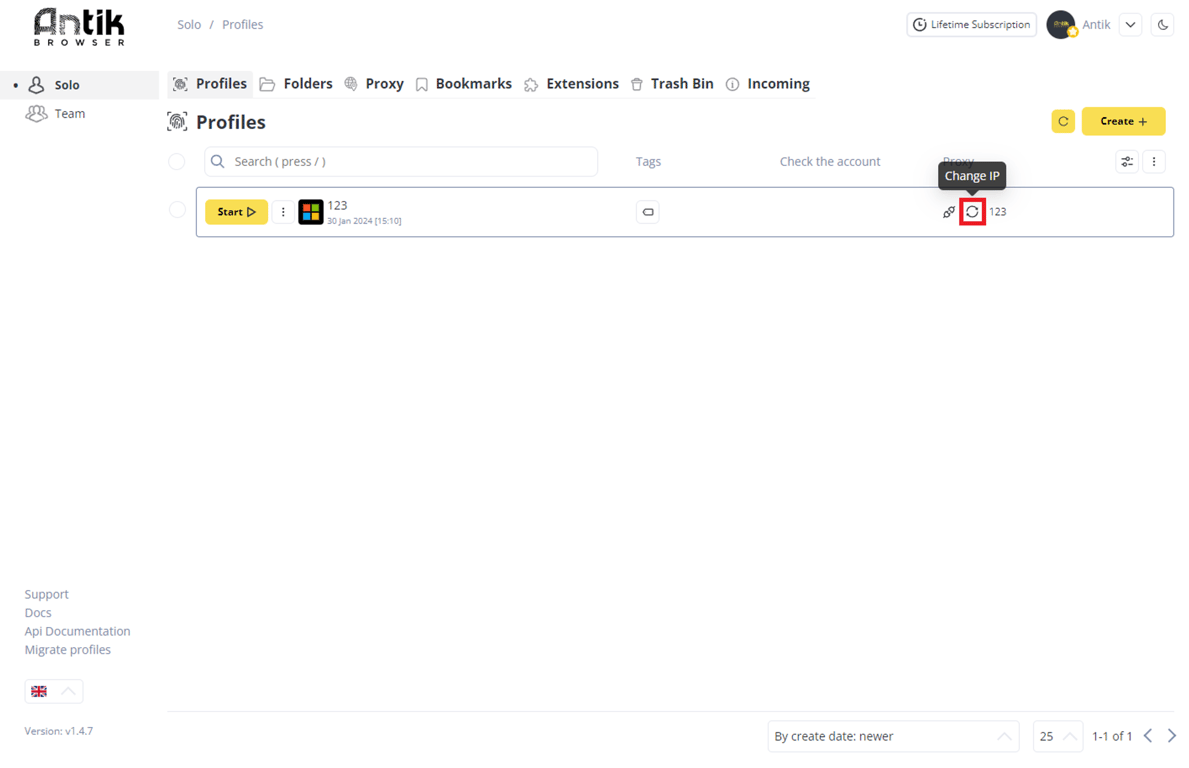
- To add a change IP address link — include this link in square brackets at the end of the entry
- ip-address:port:login:password[https://change-my-proxy.com]
Here you can also check your proxies to see if they work, by clicking on the "Check" button.

After you specify all the proxies - click the "Create" button and they will be displayed in your proxy panel.

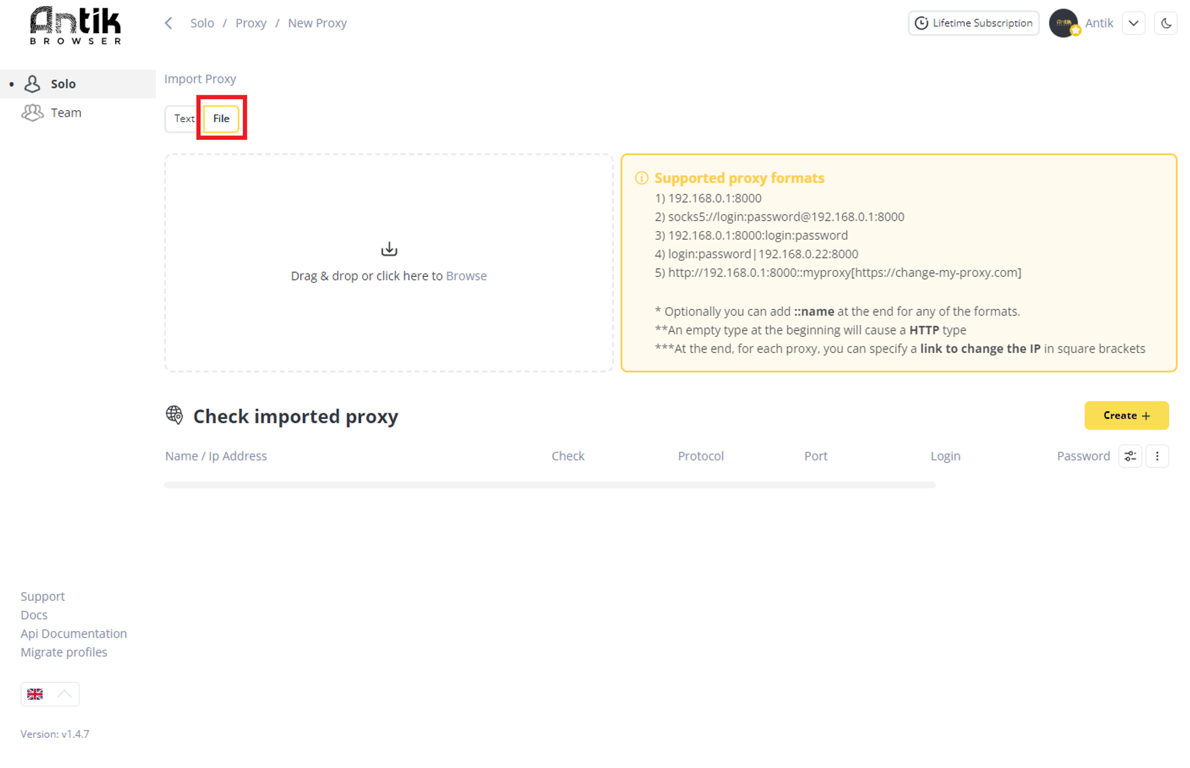
Import by file
- entry for each new Proxy must start on a new line
- if you don’t specify the protocol, then by default the protocol will be perceived as http
Create a txt file with the same proxy entry format
- if you want Proxies to be named or have change IP links attached to them — use the recording format described above
Click on the file upload window and select the target file with Proxies or drag and drop the file to the download window
Observe the recording format — your proxies will not load with incorrect format
If successful, you will see the downloaded Proxies in the list
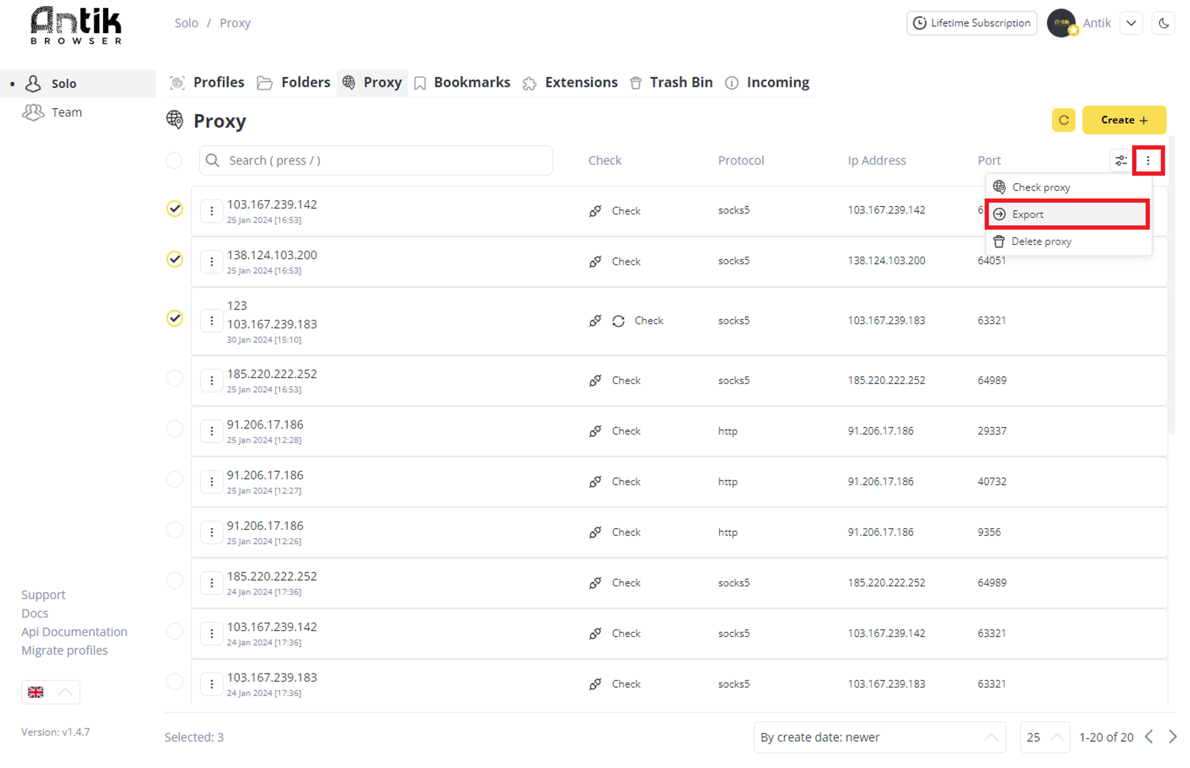
Exporting proxy
You can export your proxy list to a txt-file
- go to proxy menu
- select target proxies
- click on the bulk action button (three dots) and select Export Proxy
- specify the path to download the file — in the specified folder you will receive a txt-file with your proxies
 Made with Bullet